Axium installation guide
Welcome to Axium!
In this guide, you will prepare your environment for hosting Axium and integrating it natively with your toolchain.
Axium is a managed application available in the Azure Marketplace. It operates within your Microsoft Azure environment and integrates with your existing toolchain and infrastructure, giving you full ownership of your data at all times.
Curious about our platform? Visit the Axium website or contact us directly for more information.
Prepare your Azure environment
Axium is suitable for organizations that use the following enterprise platforms and tools:
- Microsoft Azure as the cloud platform
- Microsoft Entra ID (Azure Active Directory) for identity management and single sign-on
- GitHub for version control
If you use a different tool for version control, contact us and we'll provide you with a customized solution.
You can install multiple Axium instances within your organization. Each installation is created inside an Azure resource group within an Azure subscription of your choice.
For a smooth journey, ensure that the target subscription meets the following requirements:
Resource providers
Ensure the following resource providers are registered in the target subscription. By default, these resource providers are registered on Azure subscriptions unless your organization has explicitly unregistered them:
- Microsoft.Solutions
- Microsoft.ManagedIdentity
- Microsoft.App
- Microsoft.OperationalInsights
Roles
During the installation, you can either select an existing resource group within your target subscription or create a new one:
- If you select an existing resource group, ensure you have
Contributorpermission to the resource group. - If you prefer to create a new resource group during the installation, ensure you have
Contributorpermission on the parent subscription.
Install Axium from the Azure Marketplace
-
Run the Axium installation wizard from the Azure Marketplace.
-
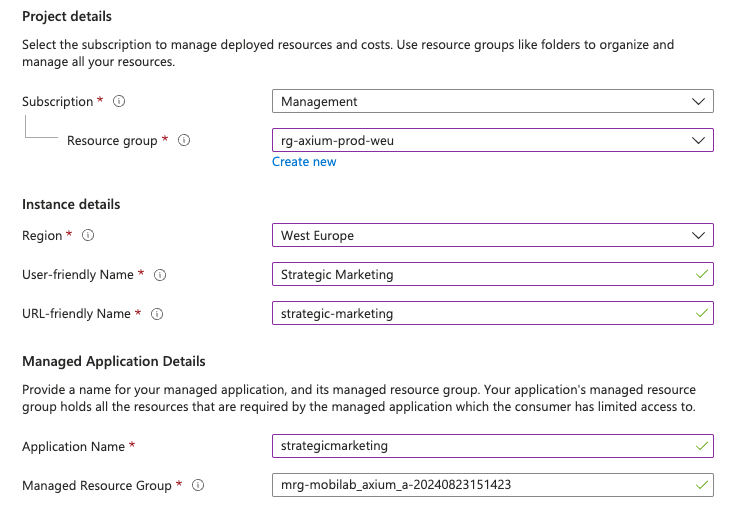
Enter the target Subscription and Resource Group where you want to install Axium.
-
Select the Azure Region for this installation.
-
Enter a User-Friendly Name. This name will be displayed as the Axium installation name.
-
Enter a URL-Friendly Name. This name will be used in the URL of Axium’s web applications.
-
Enter an Application Name. This name will be used for naming Axium resources in Azure.
-
Enter a Managed Resource Group or use the auto-generated name.
-
If you plan to integrate Axium with your private network, go to the Networking tab and follow these instructions. Otherwise, skip this step.
-
On the Review + Create tab, select Create to install.
-
Once the installation is complete, you'll find the link to your Axium home page along with the details of your managed application. Open the home page and proceed to installing our Entra App.
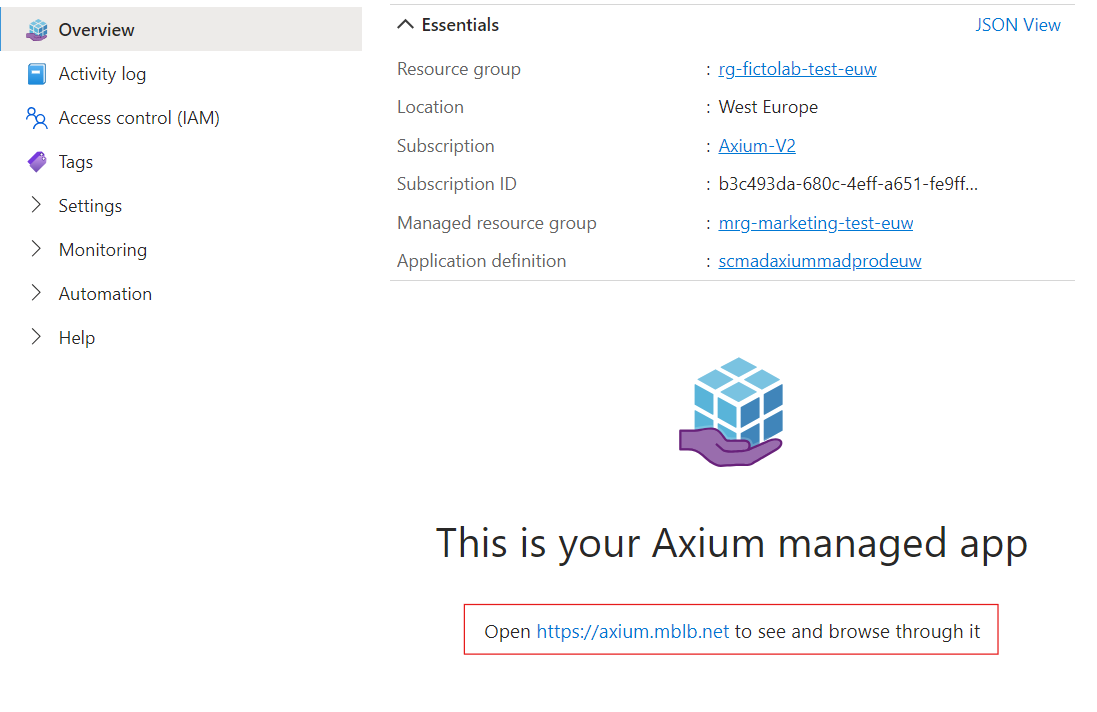
Don’t hesitate to contact us if you need support with this step.


Integrate Axium with your private network
The default Private Network settings in the Networking tab of the installation wizard are suitable if all your data sources and other relevant integrations such as GitHub and Azure Open AI are accessible over the public internet.
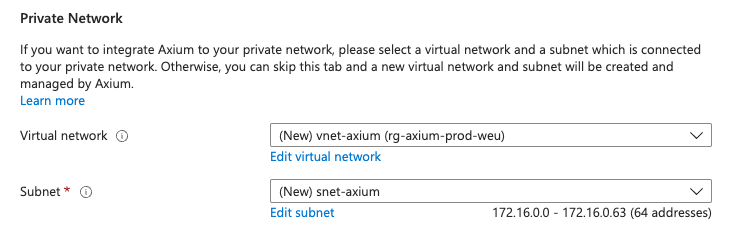
In case any of them are only accessible over your private network, you would need to provide a virtual network and a subnet that meet the following requirements:
- The subnet should be completely dedicated to the Axium installation, no other resource should use the selected subnet.
/27is the minimum subnet size required for virtual network integration.- The subnet should be delegated to
Microsoft.App/environments. For more information on how to delegate a subnet to an Azure service please read this documentation. - The subnet ranges shoud not overlap with the ranges reserved by Azure Kubernetes Service.
- Inbound connections to HTTP(S) ports (80 and 443) should be allowed from desired sources to the subnet
- Outbound connections to HTTP(S) ports (80 and 443) should be allowed from the subnet to the internet, more specifically to the following hosts:
- axium.mblb.net
- github.com
- Azure services:
- Azure Key Vault
- Azure Container Registry
- Azure Log Analytics Workspace
After selecting a subnet, the Axium installation can access integrations like Azure Databricks and Azure OpenAI that are deployed behind a private endpoint accessible from the selected subnet.
Enable or disable public access to Axium
The Axium applications can be accessed through your private network, using VPN or any other means established in your organization, provided that the selected subnet is peered with your connectivity hub and can be reached from your private network.
If you plan to disable access to Axium over the public internet and make it accessible only from your private network, you can check Disable public access to Axium to make sure no public IP is deployed and assigned to the applications.

Integrate Axium with your Azure Entra ID
After installing Axium, you’ll need to integrate with your Entra ID to allow Axium to use your organization’s existing identity and access management through Microsoft's On-Behalf-Of (OBO) technology.
This means you don’t need to manage users within Axium itself. User permissions within Axium are determined by the access rights established in your toolchain. This ensures your data remains secured according to your organization’s governance policies without added synchronization complexities or redundant user management overhead.
Axium facilitates this integration. In your Axium home page, select Install our Entra App. This is a one-time setup for your organization and doesn't need to be repeated for each Axium installation. If you don’t see this step on the Axium home page, the integration is already in place, and you can start using Axium.
Once the app is installed, you'll find your new Axium installation on the home page.
Depending on your Entra settings, you may need adminstrative consent to install the Entra App. Share the Entra App URL with your Entra administrator and request them to grant consent.
Start your Axium experience
Each Axium installation comes with a Workspace and an Explorer. Once your installation is complete, you can start your journey by:
- Navigating to your Axium Workspace and Explorer from your Axium home page.
- Accessing the Axium documentation from the Workspace for guidance on user onboarding, semantic modeling, integrating data sources, GenAI features, and more.